|
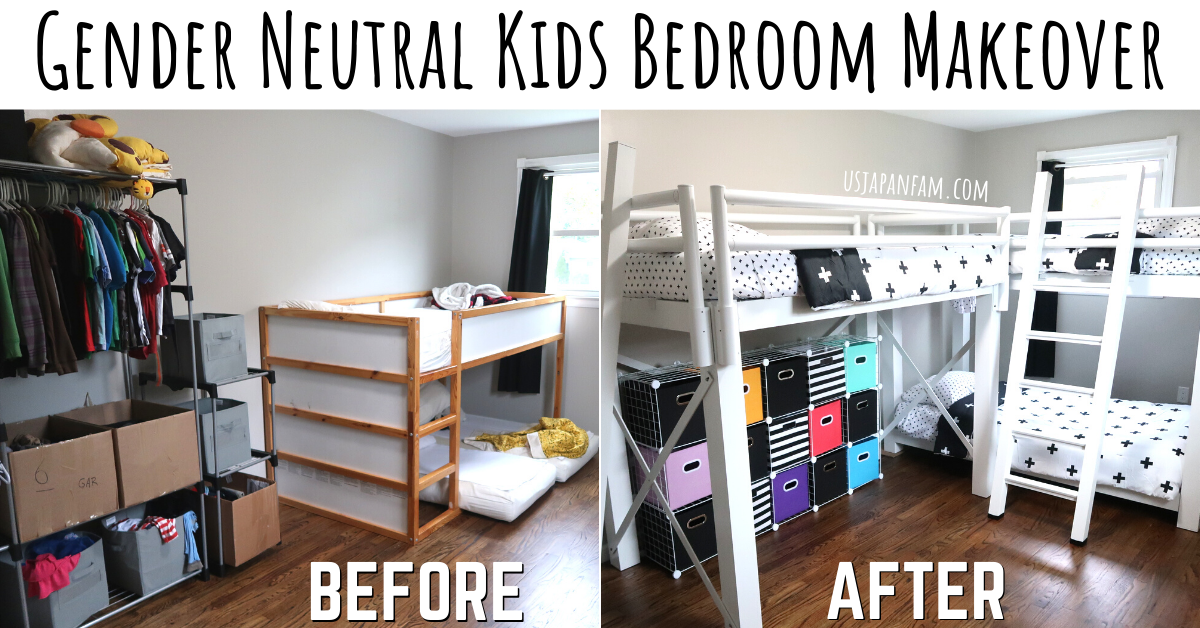
We recently moved from our tiny Brooklyn co-op to a big house in Hudson Valley, but our twins were still sleeping on their crib mattresses on the floor under big brother's Ikea Kura loft. They just turned 5 and were ready for new beds so we did some researching and I am SO excited to give you a tour and let you know exactly what we used in our kids' gender neutral bedroom makeover (so you can easily copy cat your own makeover if so inclined)!! Watch our 2 videos (1 is the loft / bunk build, the other is the rest of the makeover and final reveal) and read on for details!!
THE BEDS
It took me a while to figure out what type of beds to go with. I thought about a triple bunk but our (not even 8' high) ceilings weren't tall enough. I also thought it'd be really hard to change sheets, and not enough space between beds for the kids to sit and relax. I also considered a twin over full bed where the twins could share a bed, but thought they should have their own space. Ultimately we settled on a Twin Loft Bed and a Twin over Twin Bunk Bed from AdultBunkBeds.com (by Francis Lofts & Bunks) because:
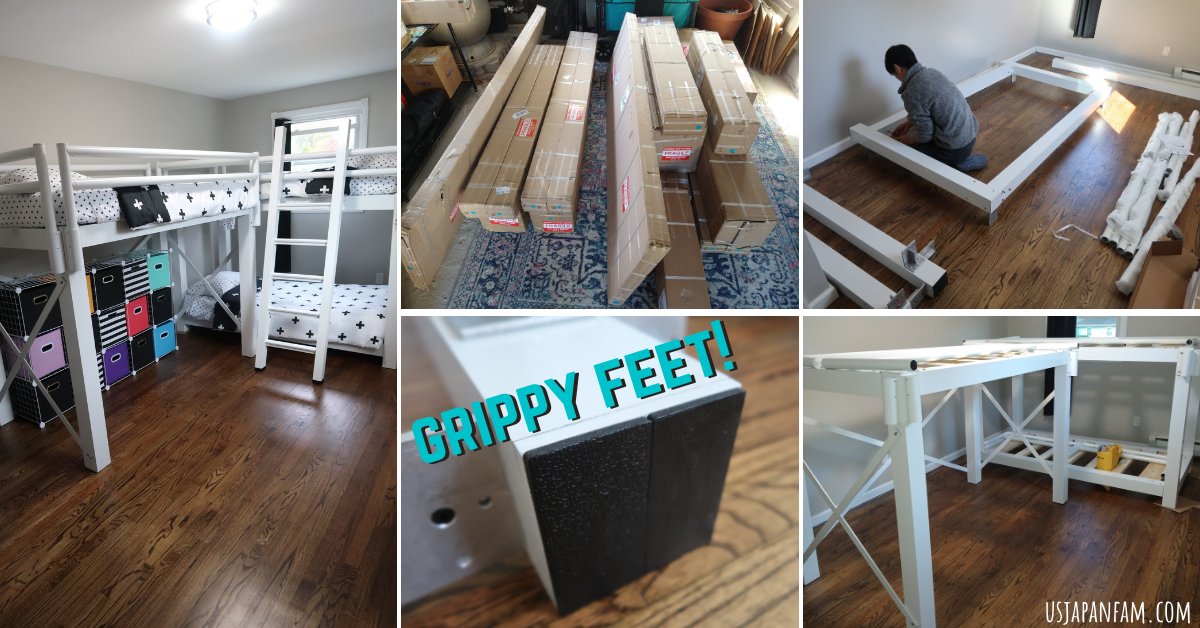
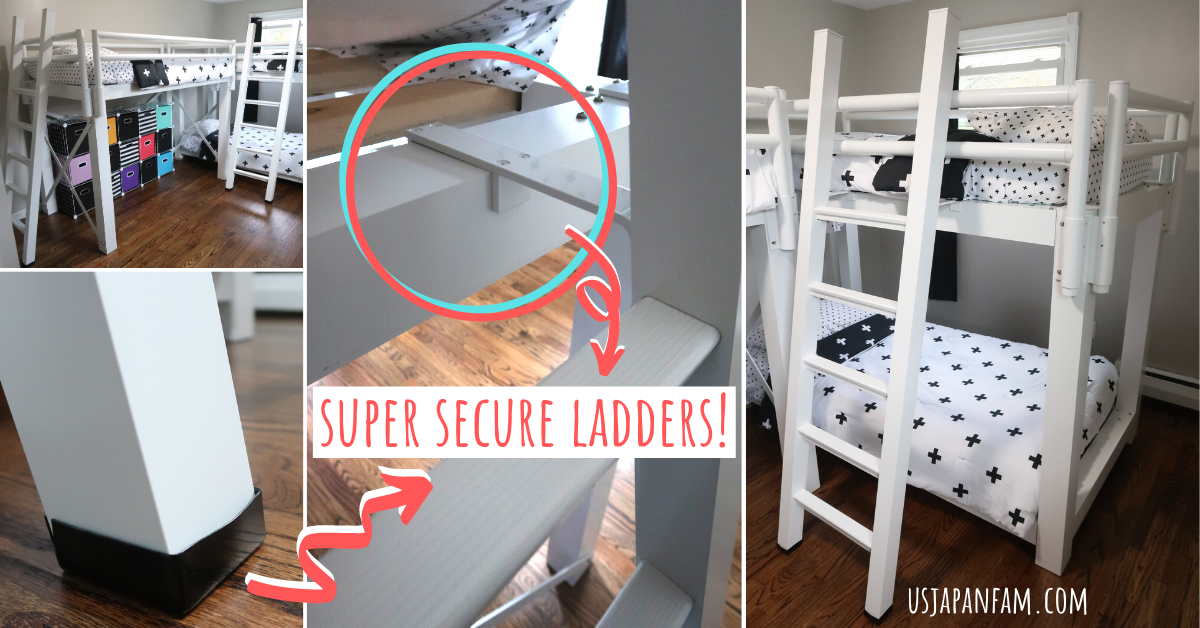
The beds came in a million pieces, 14 boxes weighing a total of 500 pounds to be exact, and we were completely overwhelmed. Thankfully, they have extremely helpful assembly videos on their website that totally saved us and it took us a few hours to get them all up. AdultBunkBeds.com has a bunch of great add-on accessories including a tray, bookshelf, pull down desk, pillow support, trundle, corner shelf, fire pole (!!!), curtains with stainless steel cable, headboards, drawers, bed skirt, and staircase with or without a hand rail. After speaking with the representative, I felt the traditional ladders would be the safest option for our kids, and was impressed with how securely they latch on! You can attach them to basically anywhere around the bunk - on the side, head, or foot of the bed, which gives you so much flexibility in arranging the room!
The feet of the beds are kind of a rubber foam which makes them really grippy, adding to their sturdiness. However, it means you can't simply slide the beds around to their best location after building them, and the bunk was HEAVY, we couldn't lift it!! The trick we did find was sliding cardboard under each leg and I was able to slide the beds around by myself this way.
THE BEDDING
Finding 3 sets of matching or coordinating bedding was my next challenge. I focused on black and white and settled on this super affordable but awesome bed-in-a-bag set from Amazon Basics (affiliate link). They have Twin/TwinXL ($40) and Queen ($50) in a ton of designs. I can't tell you how well it'll hold up long term yet but they washed and dried nicely and are really really soft! They also have a little pocket on each side of the fitted sheet which is handy for lightweight things such as chapstick, flashlight, even a phone.
THE MATTRESS & PAD
Since the guardrails on the bed are completely adjustible, we could go with any depth mattress we wanted. I decided on the Zinus 6 inch gel-infused green tea memory foam mattress (affiliate link) because my son already had one and we like it. It's CERTI-PUR US certified meaning the foam is made without fomaldehyde / ozone depleters / PBDEs TDCPP or TECP ("Tris") flame retardants / mercury / lead / heavy metals / phthalates regulated by CPSC and are low VOC emissions for indoor air quality (less than 0.5 parts per million). It has a 10 year warranty and supports up to 250 pounds. They came vacuum packed and rolled up, and need 24-72 hours to completely expand to correct size. Of course we want to protect the bed from accidents (puke, nose bleeds etc) and protect our kids from allergens, so we also got the AllerEase Waterproof Zippered Mattress Protector (affiliate link) which fully encases the mattress, is waterproof, and protects from allergens, bed bugs, dust mites, and dander!
THE STORAGE
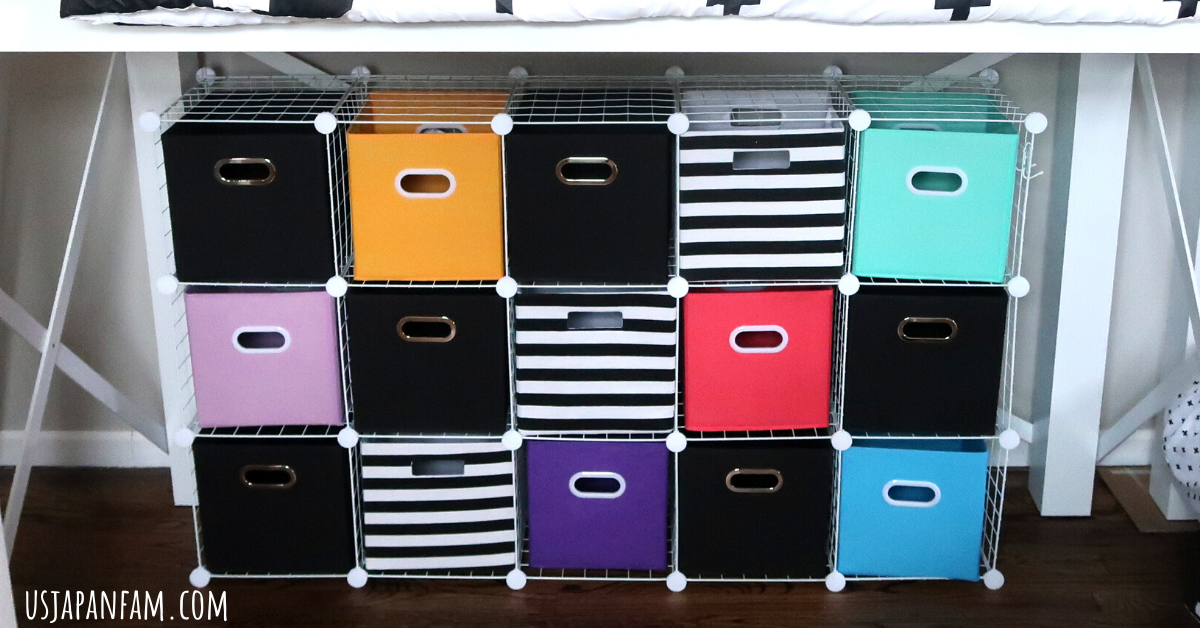
I wanted to avoid particle board dressers and storage units because of their potential toxic VOC off-gassing, so instead went with a wire frame cube storage unit (affiliate link) with fabric collapsible boxes. The frame was a PITA to assemble, but once together it seems like it'll work out. nicely, and I LOVE LOVE LOVE how it looks!! You have to be careful as the boxes can get caught up on little round disks that hold it together (you can see this in my video) but overall I think it's going to work out fine.
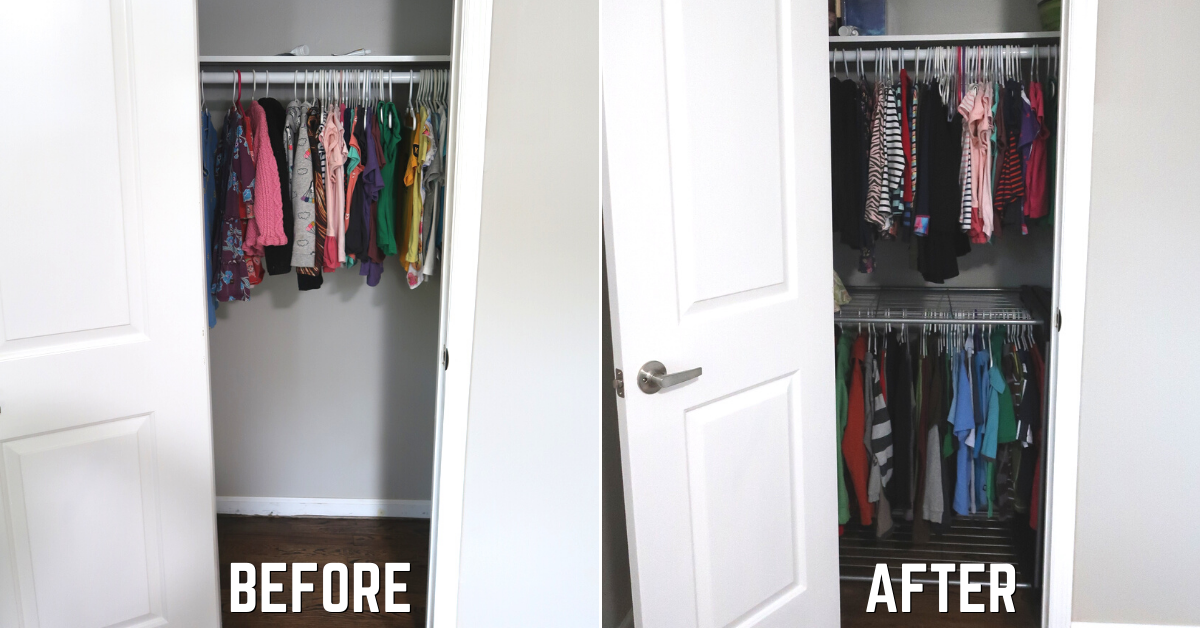
They have a decent sized closet in their bedroom so I added parts of an old hanging / storage unit we had to allow us to make use of the bottom half of the closet. We use it for all 3 kids shirts and dresses. Their pants, pajamas, undies, socks, and other items will go in the new cube storage unit - folded and rolled Marie Kondo style of course!!
OTHER ITEMS
3 Comments
Natalie
11/12/2020 09:36:57 am
You did great job with that kids room. I absolutely love it. It's clean and colorful. Love those boxes too.
Reply
11/12/2020 05:23:20 pm
Super cool kids room ideas! definitely using proper storage and cabinets helps out so much with the clutter!
Reply
Leave a Reply. |
About ME:I'm a NYC metro area mom blogger living in NJ with my Japanese husband & our 3 kids (twins plus 1), focusing on fun and honest product and travel reviews, saving moms time finding the best for their families! Find what you need in the menu bar or search section above! Categories
All
Archives
July 2024
|



 RSS Feed
