|
Brush their teeth and take them to the dentist. Simple enough, right? Wrong. There's SO much more to protecting your child's teeth and instilling proper oral hygiene, but it's not too tricky. Please note that I'm not a medical professional - I am happy to share what I've learned over the years and include a few of our favorite products, but please consult your child's doctor or dentist (if you're in the NoVa area and looking for a family dentist, be sure to check out dentists Herndon!)
Disclaimer: Affiliate links included below - we receive a small commission from sales made after clicking.
1. Electric Toothbrush
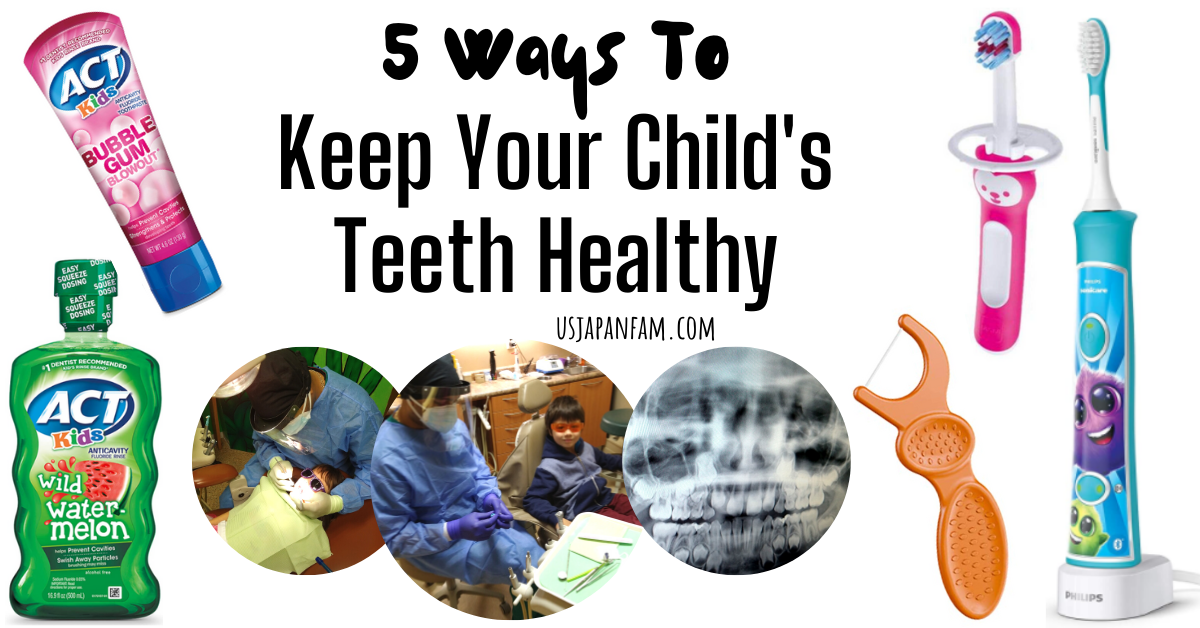
These do a MUCH better job than standard tooth brushes. Talk to your child's dentist about when to switch over to electric toothbrushes (typically this is after 3 years of age). Our dentist highly recommended Philips Sonicare Children's Electric Toothbrushes, one for each kid since their germs and strep bacteria etc can collect under the removable brush part, so he advised against letting kids share the electric base and simply swapping the heads). The kids' Philips Sonicare toothbrush comes in blue or pink with 8 decorative wraps to swap out. It also has a fun free interactive app that helps kids get motivated and enjoy brushing! It retails for $39.95 - 49.95 but we found it on sale for $29.95, so shop around especially at big sales times like Black Friday and Cyber Monday. For babies and toddlers who can't use electric toothbrushes yet, we love the MAM toothbrushes which include a protective shield! Toothpaste with fluoride is best, but not great if being swallowed. For younger toddlers, only use the amount of a grain of rice. Around age 3-6 you can increase to a pea-size amount (best not to swallow but fine if they do). Our kids love the ACT Bubble Gum!
Older kids, teens, and adults have more options for electric toothbrushes. Philips Sonicare is the name we hear most, and they have several varieties, but I personally just bought Burst for myself and my husband - it's getting great reviews from dentists and hygienists, and has a big sale through December 21:
2. Flossing
Did you realize your kids should be flossing!? I didn't, until my first child had a ton of cavities revealed at his first dental x-ray!! We immediately ran out and bought children's flossers which were a game changer - while they are wasteful and I do feel bad about that, they're super easy to use and our kids love them! I usually let them floss themselves and then I do it as well, especially between the back molars where the teeth are tight and it's harder for them to be sure they get down in between the teeth.
3. Mouth Wash
We just moved out of the city where we had fluoridated water and hadn't been using mouth wash but now we don't have fluoride in our water and our kids' new dentist just recommended mouth wash, which our kids are LOVING! We got the ACT bubble gum flavor mouthwash, you squeeze the bottle and it fills up the right dosage in the top! We then pour it into washable/reusable plastic cups so our kids don't swap germs in the bottle. They have a few flavors to choose from, have fun trying them all!
4. Avoid Certain Foods & Drinks
Avoid the following (children and adults):
5. Regular Checkups
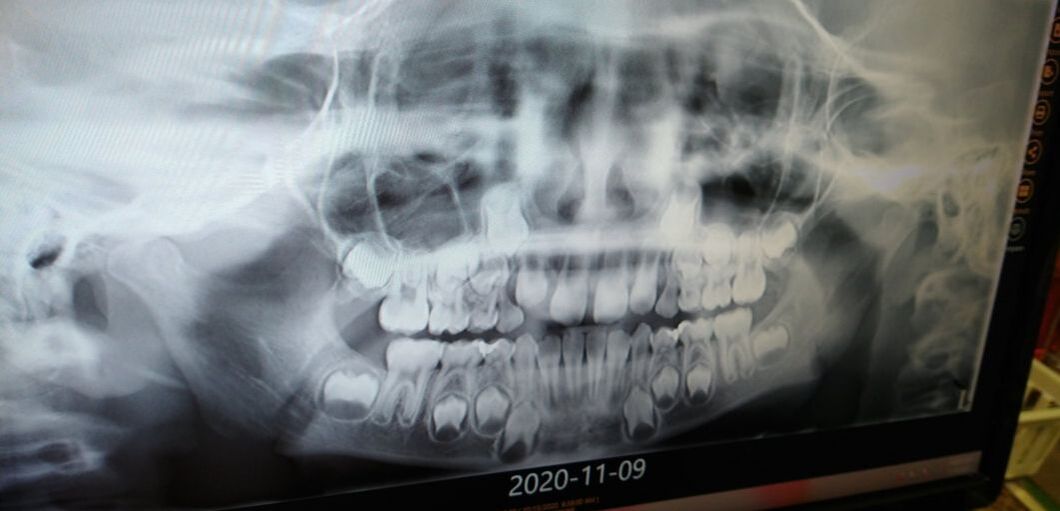
Children and adults alike should be going in for twice a year dental checkups and cleanings. But when to start? Children should go in for their first checkup by age 2, or sooner if you like! That early on, it's more about getting the child comfortable. Most pediatric dentists will have you hold the little one in your lap, and make it really fun and relaxed. They'll likely want to take x-rays by age 6, to make sure all adult teeth are accounted for, teeth are lining up nicely, and there are no abnormalities to worry about. Later on they'll keep an eye out for soft spots and things that can be corrected before needing the dreaded filling, or worse! Here's my 7 year old son's panorama x-ray from his latest checkup, pretty cool right!? The checkups are so important for staying on top of your child's dental health - the dentist will make sure you're doing all of the above things and make recommendations based on what's going on with their teeth, and allow you to ask questions about any concerns you may have!
5 Comments
From spectacular homes to ticketed festivals, below is an interactive map of the best 2020 Christmas Lights in Hudson Valley and Beyond, including Orange, Dutchess, Ulster, Rockland, Westchester and Sullivan Counties as well as Long Island, NYC, and NJ!!
Please double check details / hours / costs before heading out - we did our best compiling this list but haven't confirmed each place personally. Photos were provided or grabbed from websites, we do no own copyright. **Have a house to add?? E-mail me the address and a photo!**
**HOW TO USE THE MAP**
- click on any pin to see photo/video and notes (green are ticketed, red are free) - click the image on the top left of the map to show you the list of places - click the box on the top right to "view larger map" and it'll open it up in google maps
Who's ready to get that Christmas shopping done early, and save a ton to boot? Here are some of the best Black Friday Deals on Amazon for kids I've found, including tons of classic and trending items - the best toys for Christmas 2020!
Disclaimer: Affiliate links below - we'll receive a small commission from purchases made after clicking. US Japan Fam does not endorse any items below, unless explicitly noted that we've personally tried and love it :)
STEAM Toy Deals:
Board Games:
Card Games:
Tablets & Tech Toys:
Active Toy Deals:
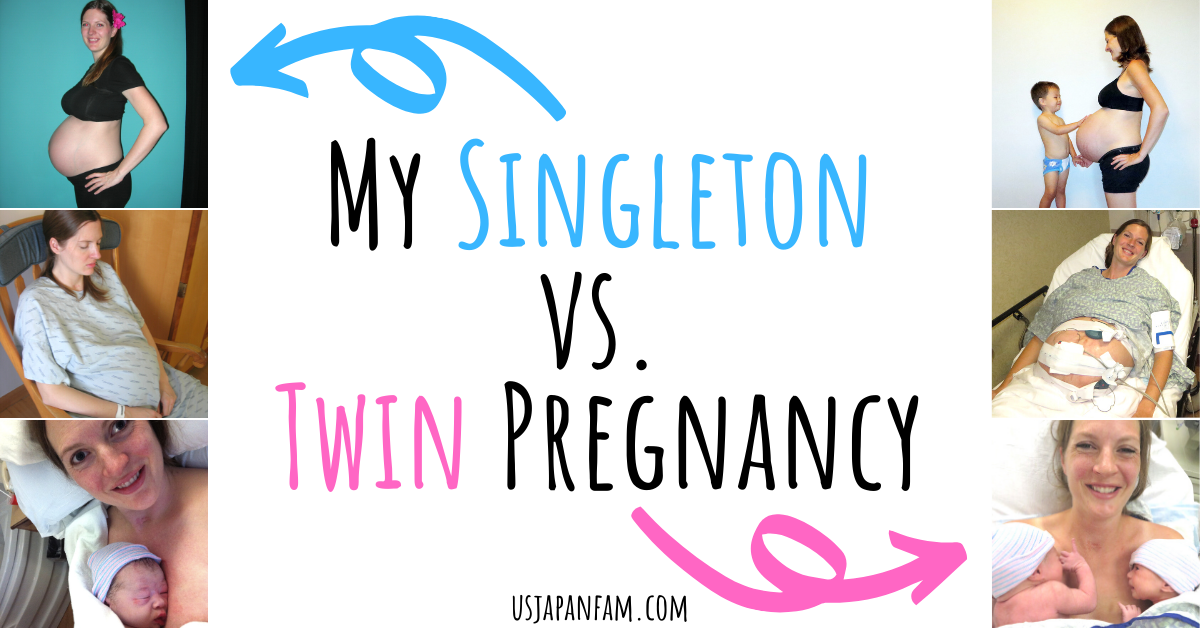
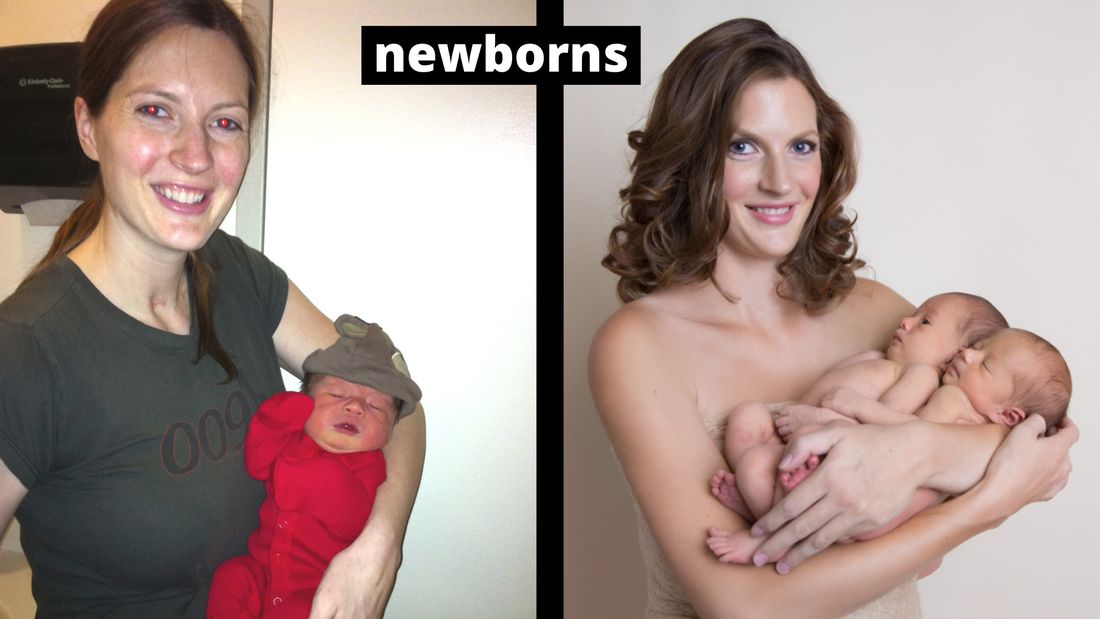
My first pregnancy (singleton) and second pregnancy (twins) were like night and day. From weight gain and how my belly looked to the delivery style and postpartum, it was all quite different. I thought it'd be fun and interesting to take a look back at the differences by comparing my singleton and twin pregnancy! You can watch it in a quick YouTube video or keep scrolling for the pix and details!
Never miss out!! Subscribe to our mailing list!!
*disclaimer: this post includes some affiliate links - we'll receive a small commission from purchases made after clicking*
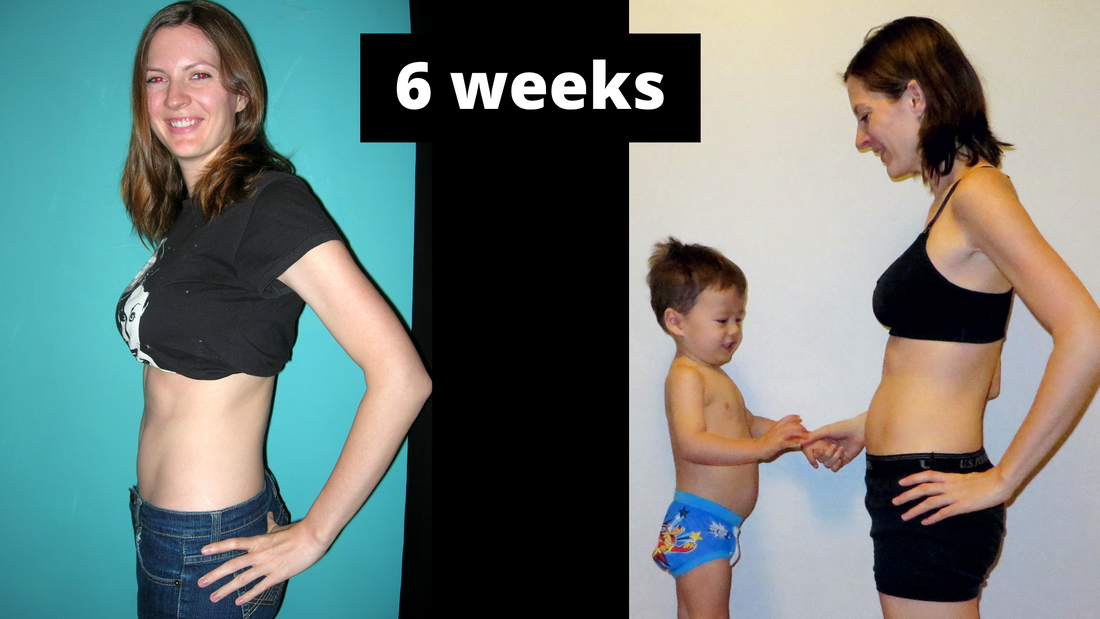
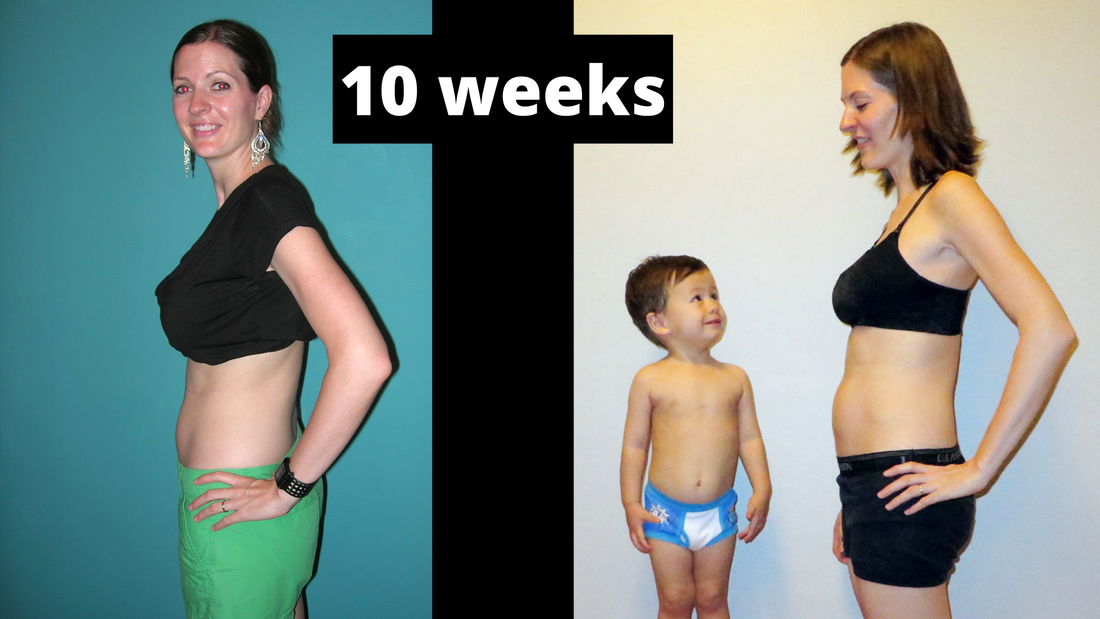
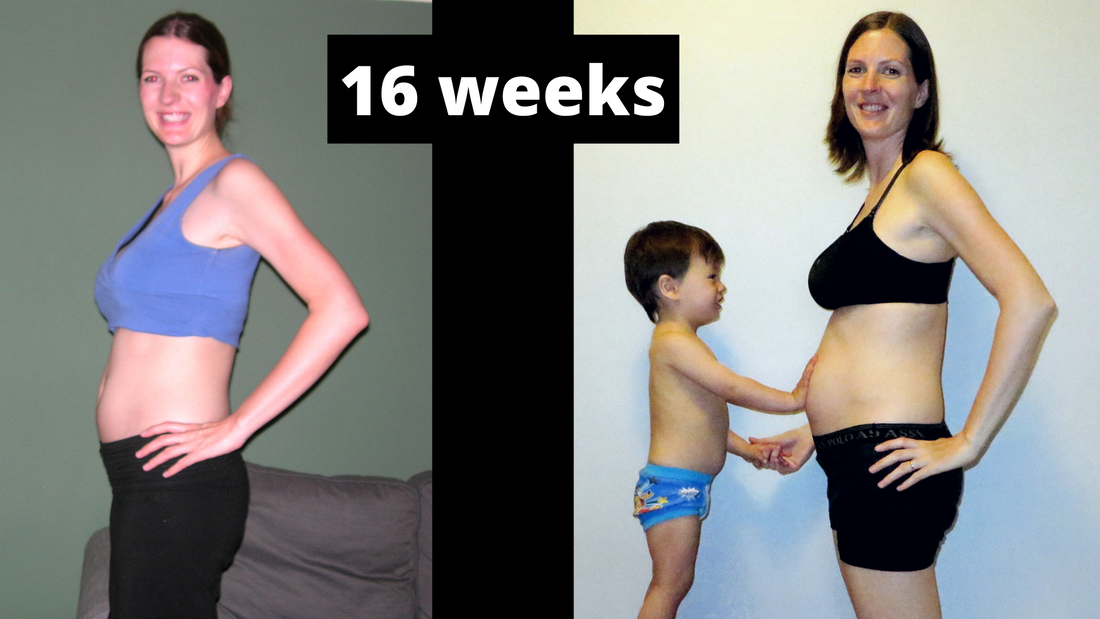
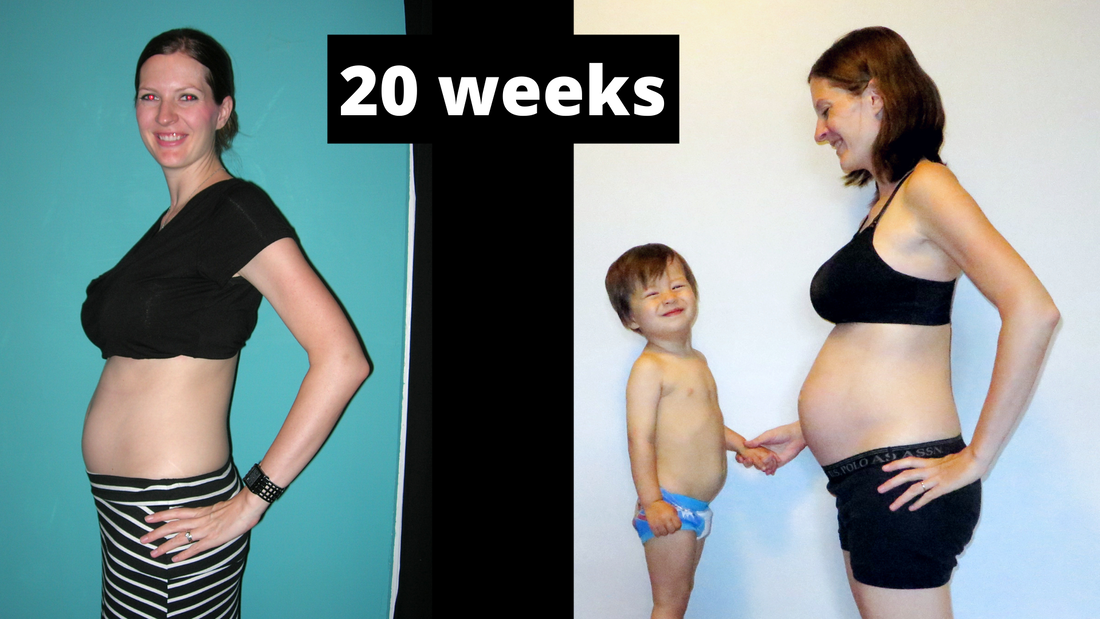
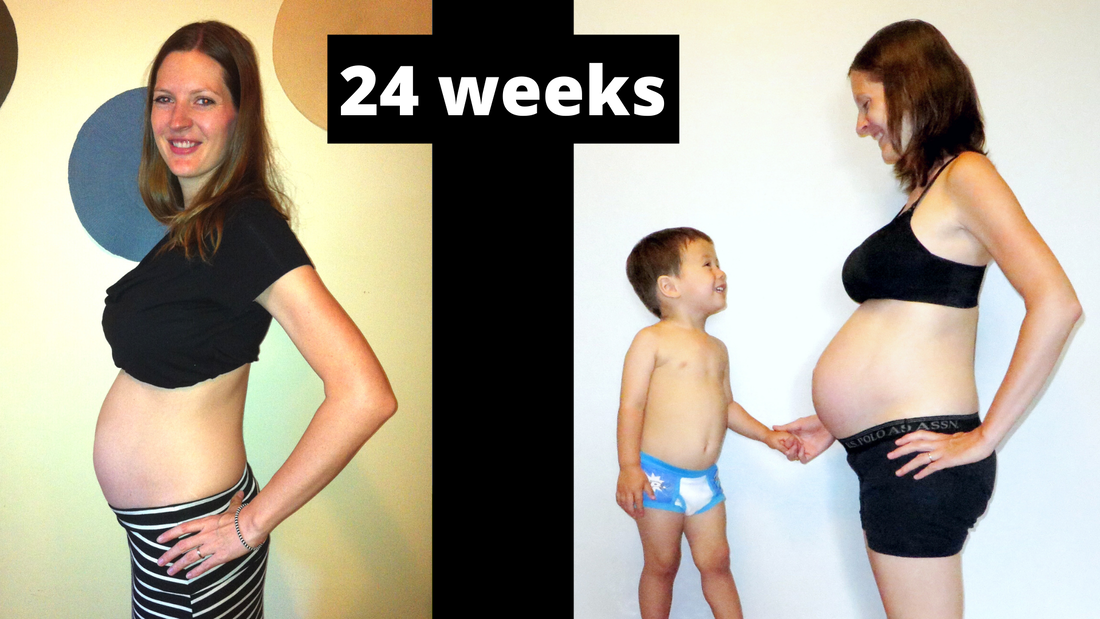
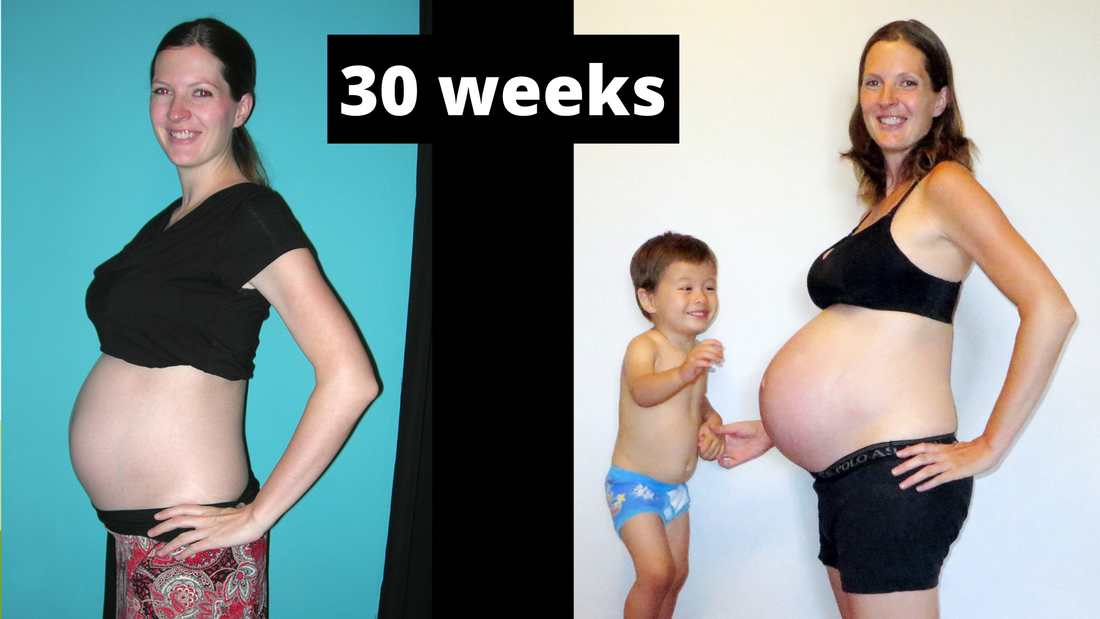
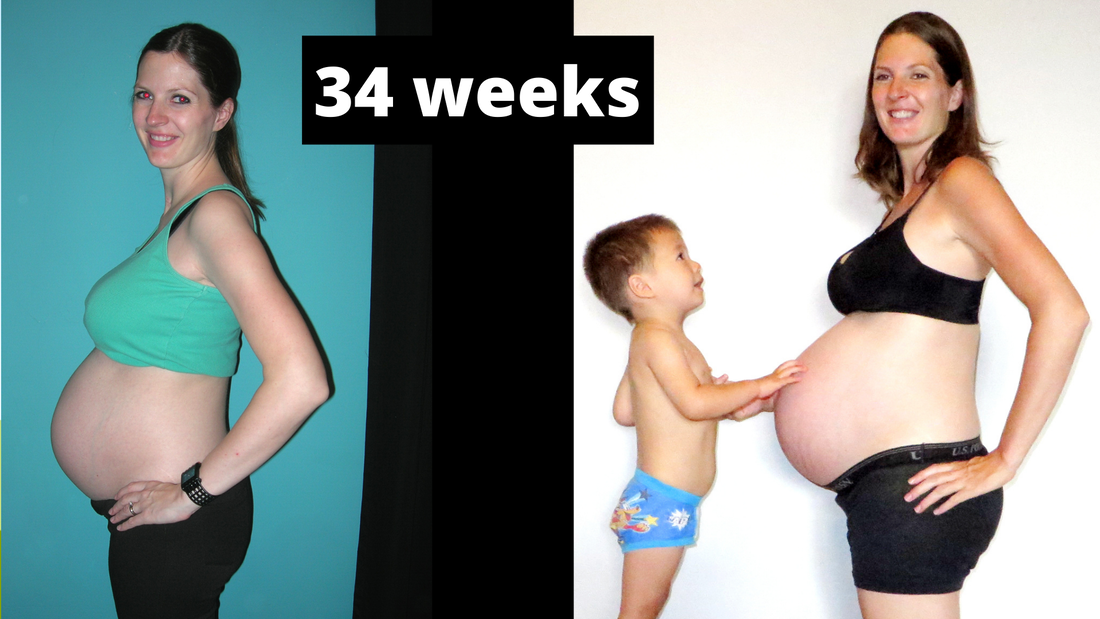
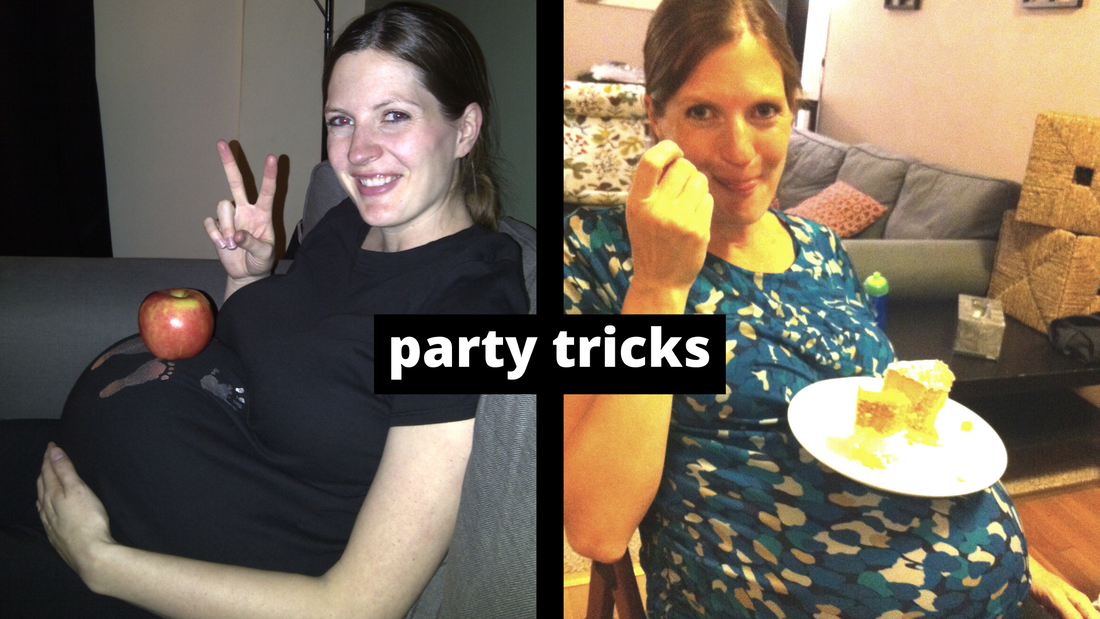
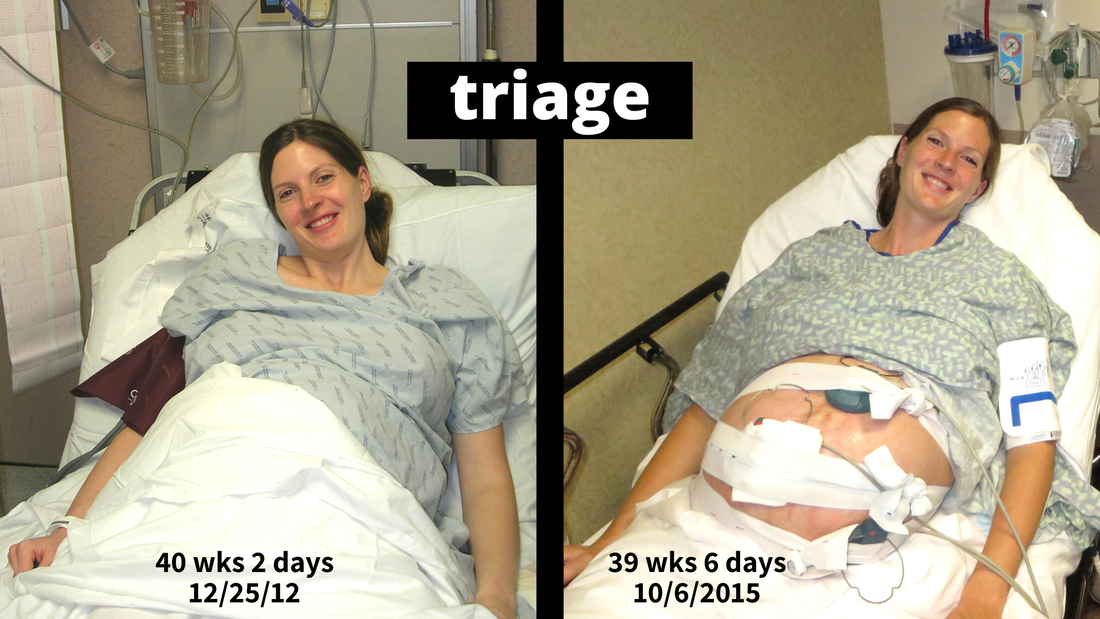
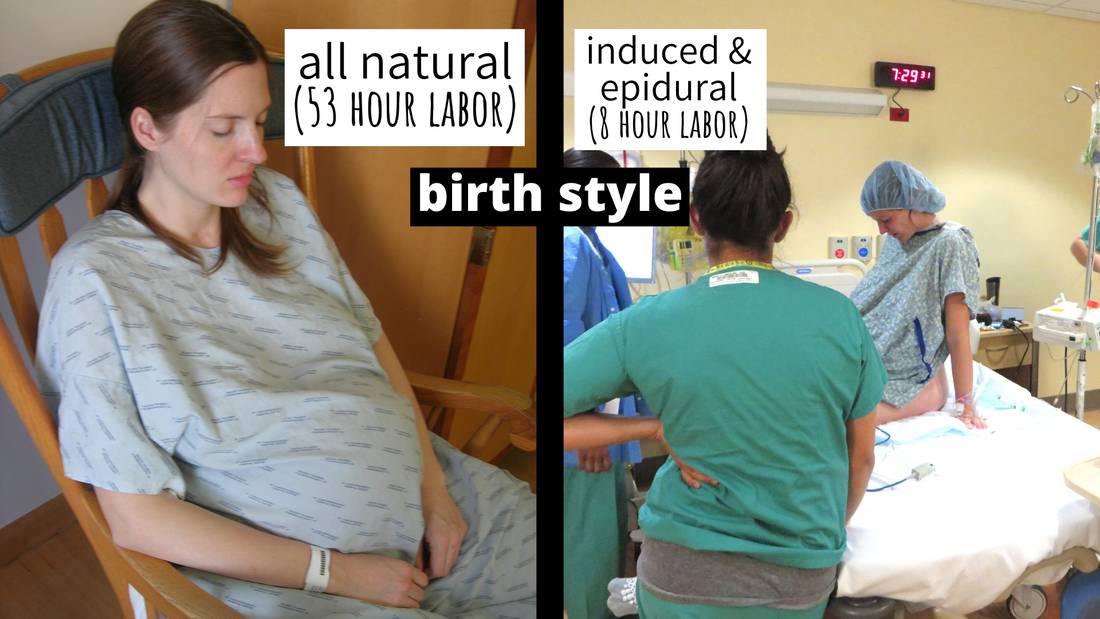
Note: in all photos below, singleton pregnancy is on left and twins on right :)
Early Weeks & Nausea
Early on, you wouldn't have known by looking at me. But for my twin pregnancy, my "morning sickness" aka all day sickness started much earlier and lasted longer too.
Check Ups
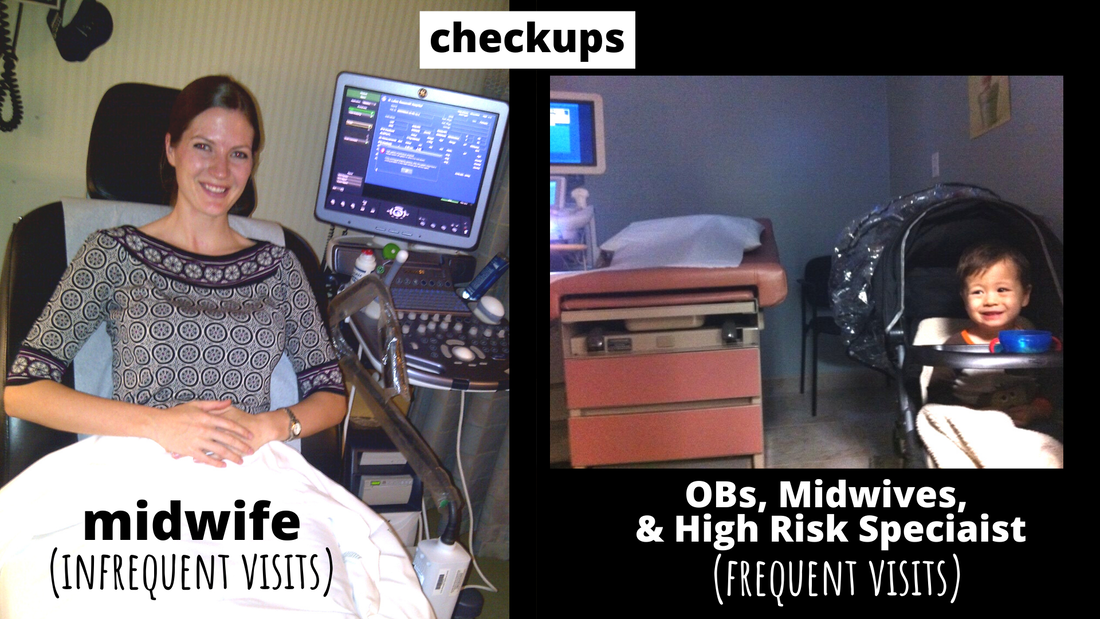
For my first baby, I wanted as natural as possible. I chose a group of midwives who only used the fetal doplar to hear the heart beat at each checkup. I had a sonogram at my initial visit (7 weeks), the standard anatomy ultra sound at 20 weeks, and another scan around 32 weeks because they wanted to confirm baby was breech (he later flipped, thank goodness). Then I used the birthing center to deliver which again was all natural. For my second pregnancy, again I went to a midwife, however as soon as she saw twins I was told I'd continue my regular checkups with them (rotating between the midwives and doctors at the practice, since I would have to have a doctor at the delivery) but also had to see an MFM (maternal fetal medicine) high risk specialist regularly. At those visits, they did a special ultrasound at EVERY visit, which I actually loved. There's such risk of one twin absorbing the other and all kinds of scary things, so it was reassuring to see them in there doing well! They always checked the blood flow in each umbilical cord, the size of babies, and also inserted a lovely probe to measure my cervix. This stopped later, maybe around 30 weeks? I can't remember, but it was a relief to not check that anymore! My MFM wanted me to delivery at 38 weeks but my OB wanted to let me go as far as 40 weeks, to make them both happy we made sure to schedule my MFM scans twice a week for the last few weeks. This meant walking 3 miles roundtrip pushing my son in his stroller. Ouchies! But kept us fit!!
Popped & Gender Reveal
I feel like from about 16 weeks is when my twin belly started to grow a bit bigger and faster than my singleton belly, though it would be many more weeks it REALLY popped. I found out the twins' sexes at around 18 weeks (girls! YAY!!) but for my first pregnancy, we didn't find out the sex! I wanted it to be my husband's big job at delivery to find out and announce it!
Viability & Weight Gain
24 weeks was a pretty big milestone for my twin pregnancy. It marked the point at which the babies could potentially survive if born early. Most doctors and twin pregnancy books also recommend the goal of gaining 24 pounds by wee 24 - this magic number has the best outcomes for twins! In the earlier weeks I didn't think it'd be possible, as I was just so nauseas most of the time. But at week 24, I was EXACTLY 24 pounds up - it was a miracle LOL! Of course, it feels absolutely rotten seeing the numbers go up so quickly on the scale, I had only gained 7 pounds at this point in my singleton pregnancy! But... you have to think about the babies' health - gaining too little or too much can put you all at risk!
My Eyebrows!?
Did you know you need at least 100 grams of protein a day when pregnant with twins? 175 is a better goal, that I always struggled to get even close to, despite throwing down protein bars and protein shakes every chance I could get! The cool thing is that your babies get first dibs at the nutrients you take in, and if they don't get what they need, they'll take it out of you like the cute little succubi they are ha! While I'll never know if it was a result of my not getting enough protein or other vitamins, I suspect that my losing my eyebrows (seen below right) was due to this. Thankfully eyebrow pencil worked wonders and they grew back in full shortly after giving birth!!
Whoa Belly!!
From about 30 weeks, my twin belly seriously looked full term, and it was from here on out that strangers would think they were so cute with their comments like "Whoa you're about to pop!!" to which I'd answer, "Nah, about 2 more months" hahahaha by 35 weeks I was obscenely large and in charge and they would joke "What are you having twins or something" thinking they're being funny or passively aggressively trying to make fun of me perhaps? But I loved answering blankly, "Yes." So fun! What was not fun were the aches and pains. The varicose veins down under and my round ligament pains in my hips made walking downright painful, yet I still made a point of walking at least a mile a day, and even pushing my son in his stroller 3-4 miles 1-2 times a week when I had my checkups at the maternal and fetal health specialist! It wasn't comfortable, but I think keeping fit really helped me stay fit and keep those babies cooking!!
Full Term!
I carried both pregnancies full term. My son was actually overdue at 40 weeks and 2 days (I gained 26 pounds and he was 8 pounds 1 ounce). I was so nervous because I was planning to deliver naturally at the birthing center, and you aren't allowed to deliver there if you go past 40 weeks 6 days! I made it just in time! Twins are considered full term earlier at 38 weeks which is when most doctors want to deliver them by (risks go up quickly after that). My team was confident to let me go as far as 40 weeks as long as I was getting twice a week ultrasounds and everything was going perfectly! So at 39 weeks and 6 days they finally induced me. I had gained 43 pounds and my girls were 6 pounds 11 ounces and 5 pounds 9 ounces. So I gained 17 pounds extra for the twins!
The Delivery:
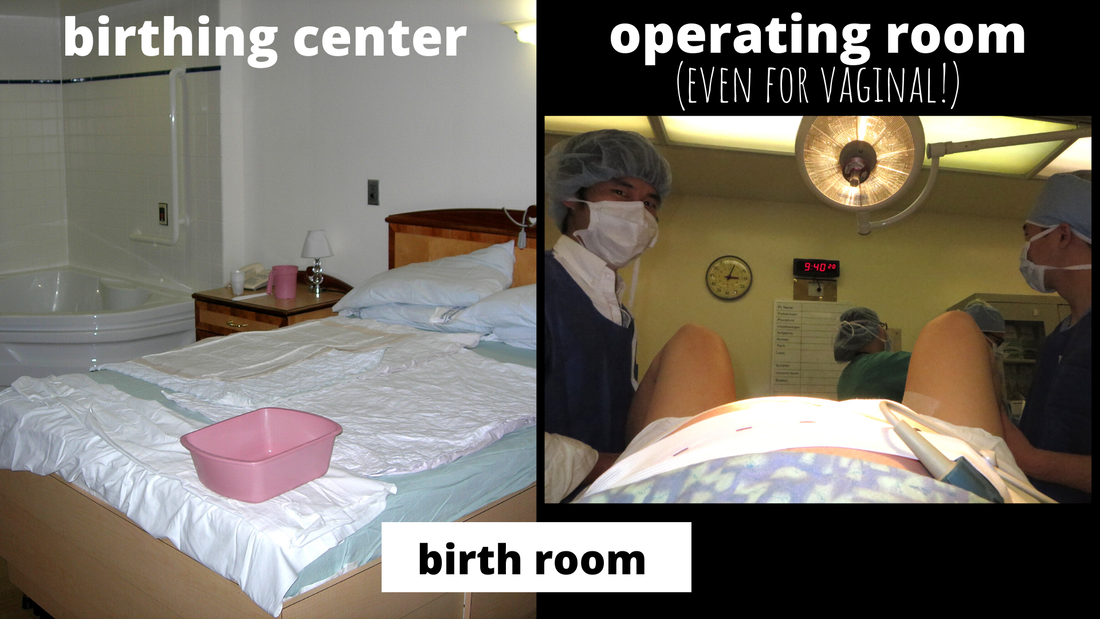
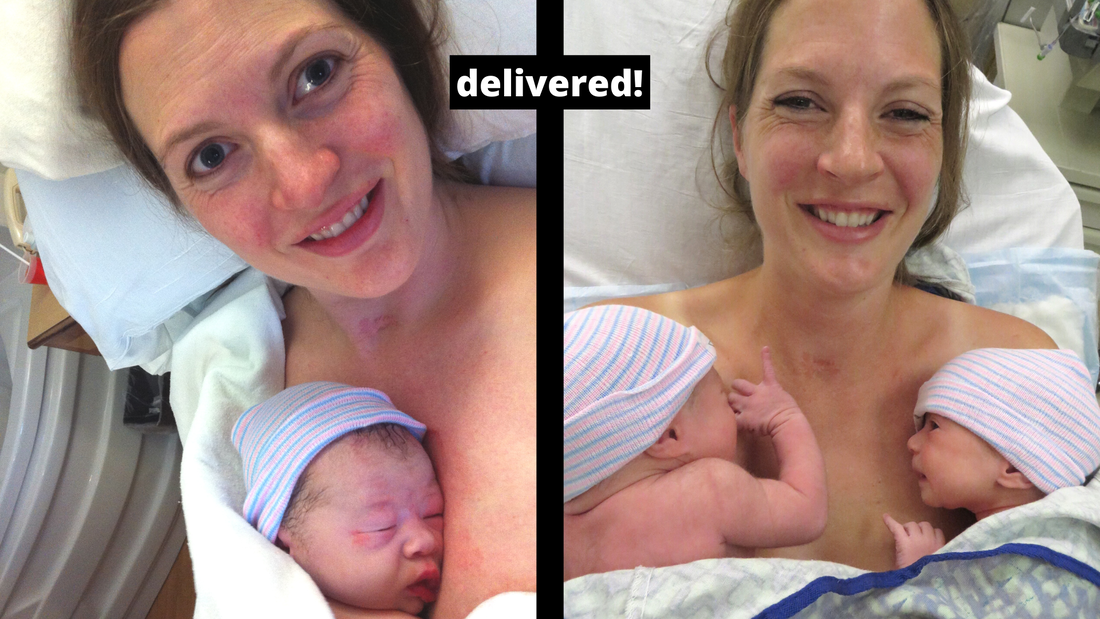
For my son, I labored at home for 43 hours (ohhhh the pain) and then spent the final 10 hours of labor at The Birthing Center at Roosevelt Hospital. It's a special unit of just a few beds separate from the regular OB floor. No drugs, just a midwife and a nurse! I thought this was perfect for me, not wanting meds pushed on me, but was just 1 floor away from doctors and surgeons should something scary happen. Thankfully it went perfectly - had him on Christmas Day 2012 and spent just 1 night in the same room where we labored and delivered him, in a regular queen bed (not an adjustable one). (See his full birth story here). For my twins, we scheduled an induction at 39 weeks 6 days. They started an IV and put me on pitocin, broke my water, and let me labor a few hours (so painful, pitocin is NOT fun). When I got to 9cm I finally broke and got the epidural they had been pushing me to get - my doctor wanted me to have one in place just in case I needed an emergency c-section for the 2nd baby, that way they wouldn't have to knock me out. I got the epidural AND the drugs and it was so wonderful. Pushed them both out painlessly a couple of hours later in the OR - yes, all twins and multiples must be delivered in the operating room, even if vaginal! I believe it's related to the number of people who must attend the delivery, at least 6 (mom, partner, OB, anesthesiologist, a pediatrician or neonatologist for each baby, at least 1 nurse, likely a handful of med students, and more doctors and nursees depending on how many babies ). I was really nervous about what a horrible situation it would be, on a cold flat operating table with bright lights. But honestly, in the moment, I couldn't have cared less! (read the twins' full birth story here).
Hospital Stay
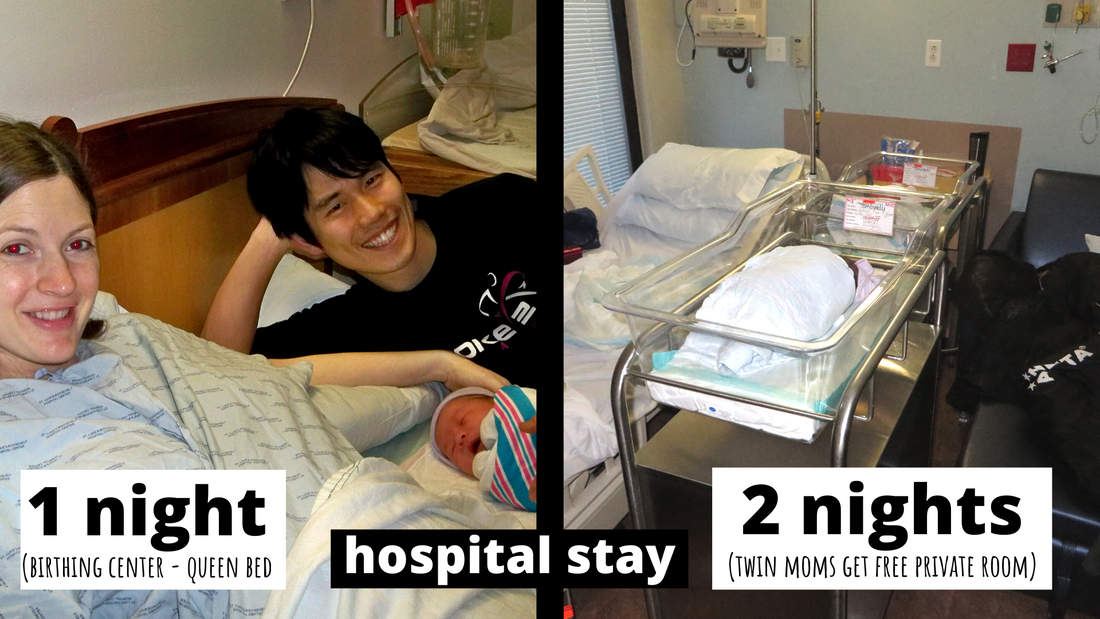
My son stayed in the room with us the entire time in the hospital - he got cleaned up and got his shots and everything right by my side. My girls were whisked away several times to be cleaned and once because they wouldn't stop crying and poor mama just wanted to sleep! It's funny how different I felt the first time and the second time. The first time, I probably would have fought any soul trying to take my baby away! The next time around, I was like, whatever, please take them for a bit, I need to sleeeeeep!!! At the birth center, we had a private room, just part of how things were different from the regular OB ward and it was one of the reasons I chose to deliver there! The next time around, we also lucked out with a private room because moms of twins and multiples get a FREE private room!!! Because they need the space for 2+ bassinets! This meant my husband got to stay with me, although not too comfy on a fold out chair!
Breastfeeding
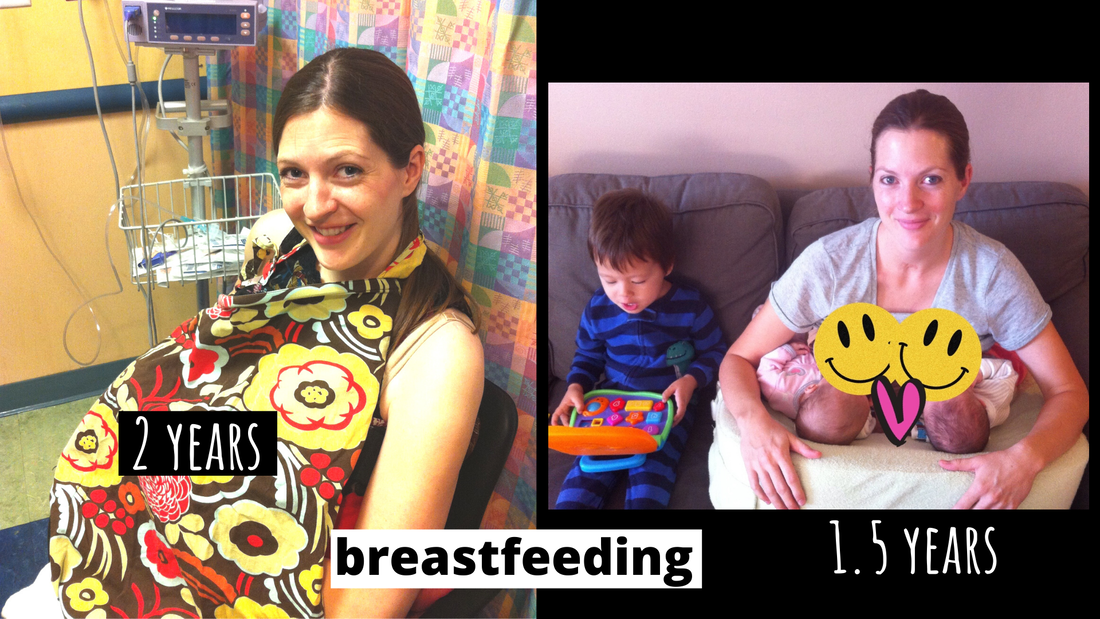
I was lucky that, while painful at first, breastfeeding was pretty easy for us. The first time around, I suffered through EXCRUTIATING latch, baby overfeeding (like 45 minute feeds), and usually tons of spit up. But he porked up and we just chugged along! I ended up breastfeeding him til he turned 2 years old!! For my twins, it started out alright but Emi didn't gain any weight over 2 weeks after her initial 10% weight loss (which is totally normal and fine for new borns to lose that much right after birth but they're expected to start gaining quickly). I saw a free lactation consultant at our pediatrician and she saved us!! She confirmed my milk production wasn't the problem, it was just Emi was so weak and not able to nurse efficiently. So basically I bought a scale, weight her before and after feeds, and pumped and bottle fed her at least once a day to make sure she was getting enough milk. At the end of 2 weeks of doing this, she had caught up to her sister's weight and was able to nurse well. From then on the girls were within an ounce of eachother for the next 2 years or so!! Now at 5, Emi is about 1 inch taller and 2 pounds heavier LOL! I breastfed them for 1.5 years - at home using My Brest Friend Twin Deluxe nursing pillow, and even out in public single or tandem under a cover!! Oh the stares we would get, never once got a mean comment, I think mostly people were stunned... or I like to think, impressed!
Getting Around
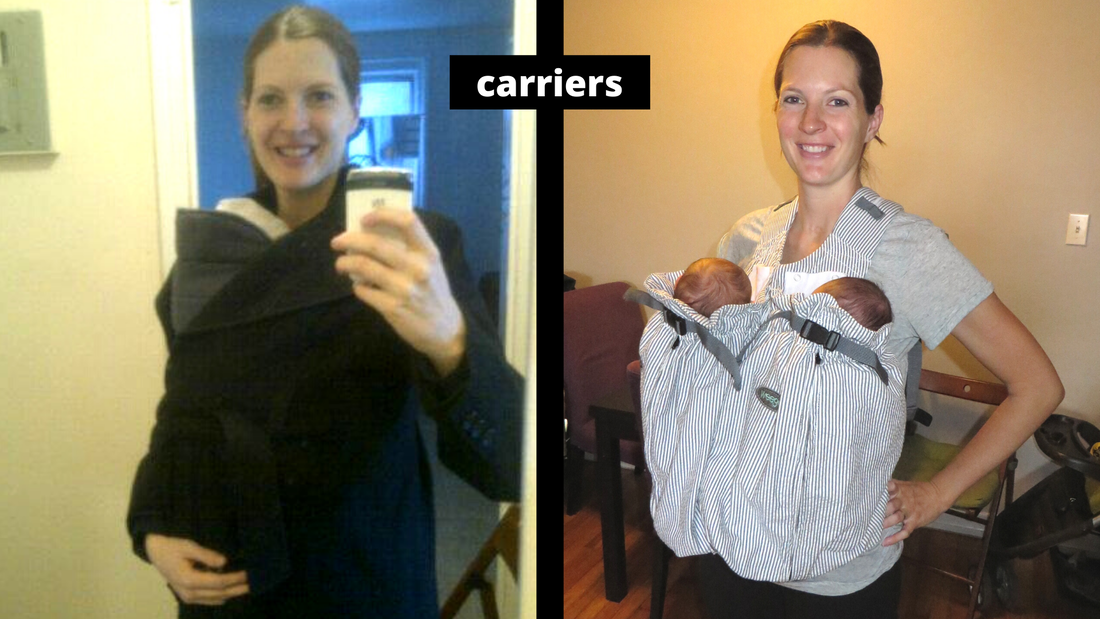
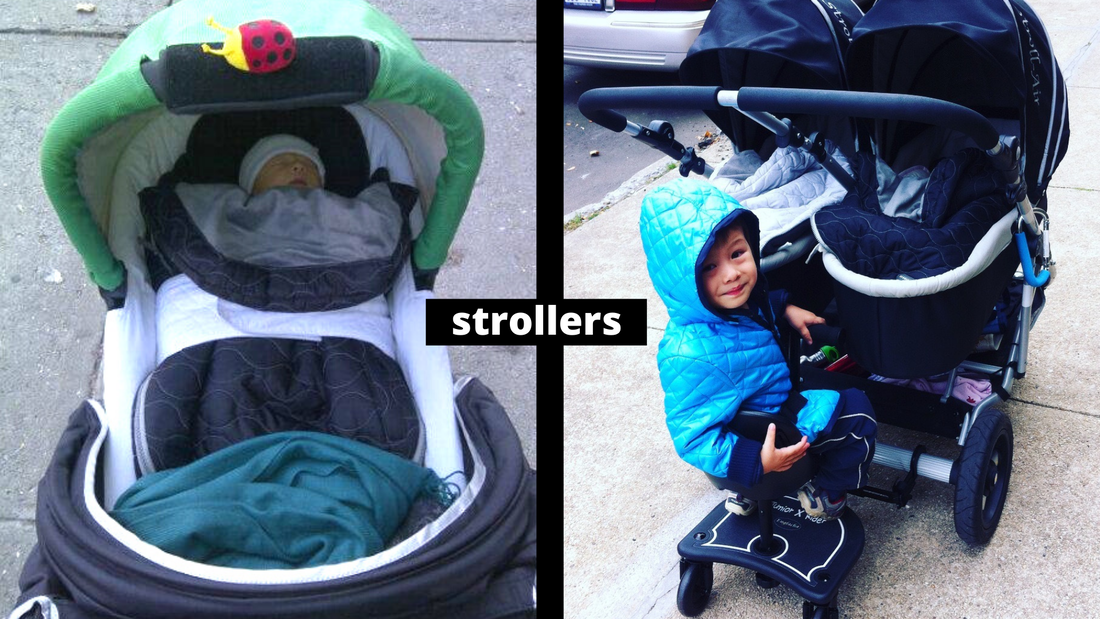
For my son, I used a Mei Tai Carrier and a Britax single stroller. For my twins, initially anyway, we used the StrollAir MyDuo stroller with the Englacha ride on seat (affiliate link) behind it. My son still did stroller naps so I could throw him into a seat and wear a baby if we needed to. When we had to take the subway into the city, I would usually put Kenzo in the stroller and wear the twins in our WeeGo twin carrier (under 4 months) and later the TwinGo carrier. Later we loved the StrollAir Solo to Tango and Evenflo Pivot stroller with the Buggy Board Maxi+ sit/stand ride on behind it. Reviews linked above and videos below!!
Postpartum Belly & Weightloss
I was lucky that my weight was back to pre-pregnancy within 6 months for both singleton and twins, without any effort of my own. I chalk it up to good DNA and breastfeeding. Did you know breastfeeding twins burns about 1000 extra calories a day!?? The tricky part was weaning them and not gaining a ton because I was used to eating as much as I could through pregnancy and 1.5 years of breastfeeding LOL! They did leave me with the dreaded stretched out wrinkly #twinskin though - come see that here!! What your belly looks like after twins!!
Tis the season to be jolly, and what better way to be extra jolly than by donning cute holiday wear, hilarious Christmas t-shirts, and drinking from silly holiday-themed Christmas mugs!? Here are some great options below!!
Disclaimer: This post includes affiliate links - you won't pay more but we'll receive a small commission from purchases made after clicking. Also note, we haven't ordered or tried these personally (except for the Pearhead mug), so aren't able to offer personal review or recommendation - we just found these online and think they look awesome!
Hilarious Christmas T-Shirts (G-rated):
Hilarious Christmas T-Shirts (Not around Kids):
Cute Christmas Long Sleeve Tees:
Cute & Funny Christmas Mugs & Tumblers:
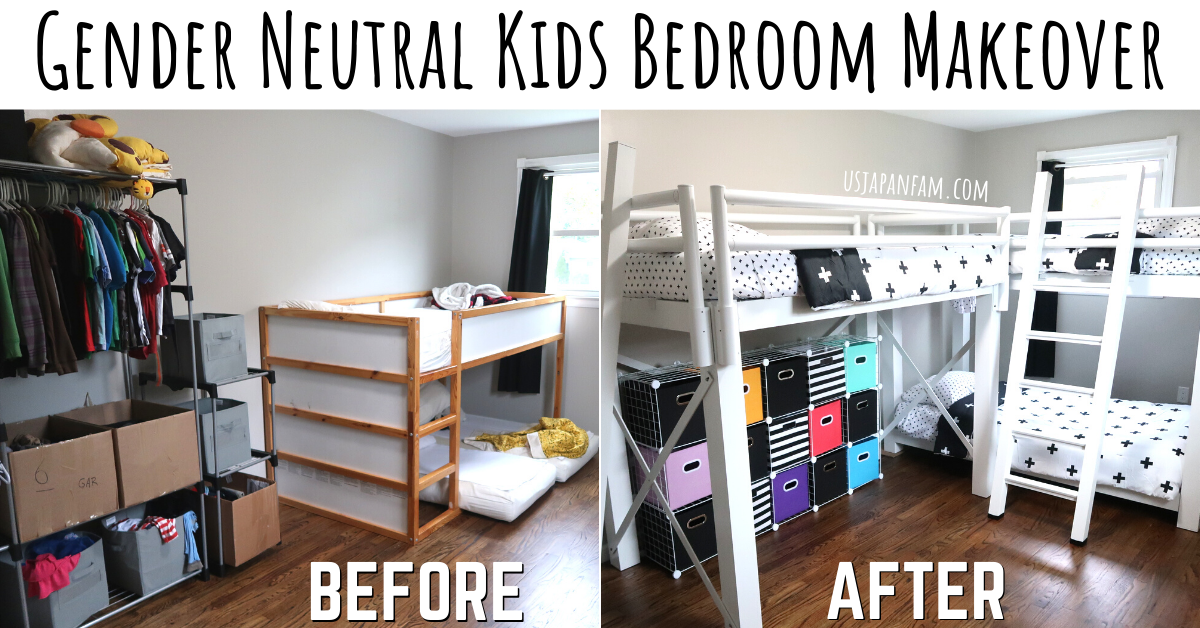
We recently moved from our tiny Brooklyn co-op to a big house in Hudson Valley, but our twins were still sleeping on their crib mattresses on the floor under big brother's Ikea Kura loft. They just turned 5 and were ready for new beds so we did some researching and I am SO excited to give you a tour and let you know exactly what we used in our kids' gender neutral bedroom makeover (so you can easily copy cat your own makeover if so inclined)!! Watch our 2 videos (1 is the loft / bunk build, the other is the rest of the makeover and final reveal) and read on for details!!
THE BEDS
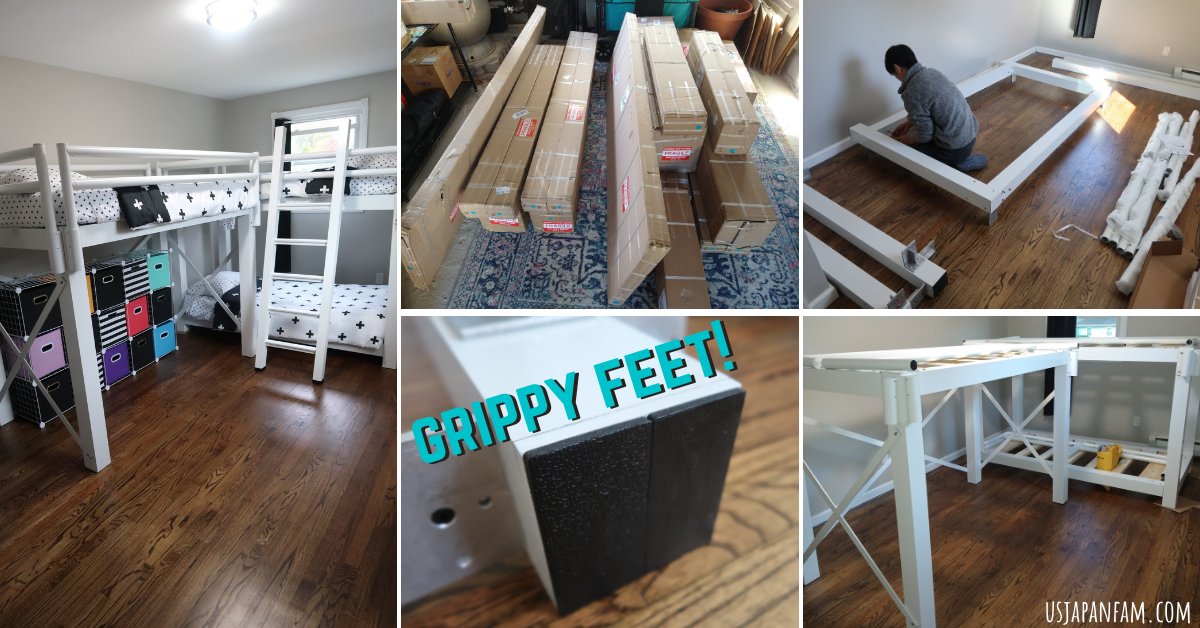
It took me a while to figure out what type of beds to go with. I thought about a triple bunk but our (not even 8' high) ceilings weren't tall enough. I also thought it'd be really hard to change sheets, and not enough space between beds for the kids to sit and relax. I also considered a twin over full bed where the twins could share a bed, but thought they should have their own space. Ultimately we settled on a Twin Loft Bed and a Twin over Twin Bunk Bed from AdultBunkBeds.com (by Francis Lofts & Bunks) because:
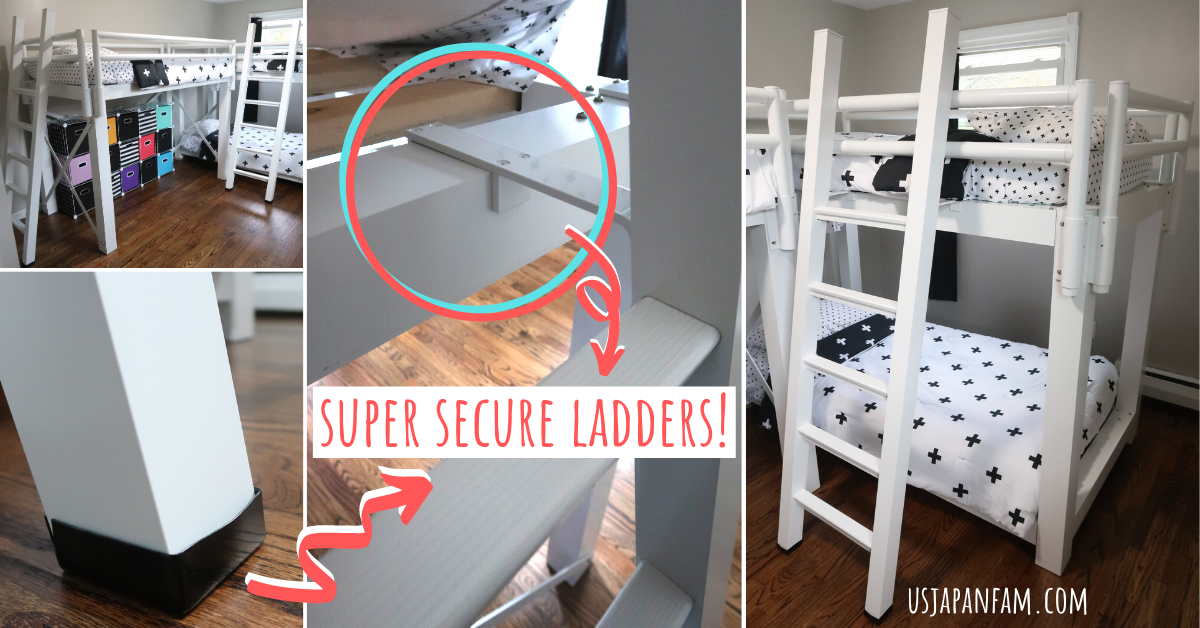
The beds came in a million pieces, 14 boxes weighing a total of 500 pounds to be exact, and we were completely overwhelmed. Thankfully, they have extremely helpful assembly videos on their website that totally saved us and it took us a few hours to get them all up. AdultBunkBeds.com has a bunch of great add-on accessories including a tray, bookshelf, pull down desk, pillow support, trundle, corner shelf, fire pole (!!!), curtains with stainless steel cable, headboards, drawers, bed skirt, and staircase with or without a hand rail. After speaking with the representative, I felt the traditional ladders would be the safest option for our kids, and was impressed with how securely they latch on! You can attach them to basically anywhere around the bunk - on the side, head, or foot of the bed, which gives you so much flexibility in arranging the room!
The feet of the beds are kind of a rubber foam which makes them really grippy, adding to their sturdiness. However, it means you can't simply slide the beds around to their best location after building them, and the bunk was HEAVY, we couldn't lift it!! The trick we did find was sliding cardboard under each leg and I was able to slide the beds around by myself this way.
THE BEDDING
Finding 3 sets of matching or coordinating bedding was my next challenge. I focused on black and white and settled on this super affordable but awesome bed-in-a-bag set from Amazon Basics (affiliate link). They have Twin/TwinXL ($40) and Queen ($50) in a ton of designs. I can't tell you how well it'll hold up long term yet but they washed and dried nicely and are really really soft! They also have a little pocket on each side of the fitted sheet which is handy for lightweight things such as chapstick, flashlight, even a phone.
THE MATTRESS & PAD
Since the guardrails on the bed are completely adjustible, we could go with any depth mattress we wanted. I decided on the Zinus 6 inch gel-infused green tea memory foam mattress (affiliate link) because my son already had one and we like it. It's CERTI-PUR US certified meaning the foam is made without fomaldehyde / ozone depleters / PBDEs TDCPP or TECP ("Tris") flame retardants / mercury / lead / heavy metals / phthalates regulated by CPSC and are low VOC emissions for indoor air quality (less than 0.5 parts per million). It has a 10 year warranty and supports up to 250 pounds. They came vacuum packed and rolled up, and need 24-72 hours to completely expand to correct size. Of course we want to protect the bed from accidents (puke, nose bleeds etc) and protect our kids from allergens, so we also got the AllerEase Waterproof Zippered Mattress Protector (affiliate link) which fully encases the mattress, is waterproof, and protects from allergens, bed bugs, dust mites, and dander!
THE STORAGE
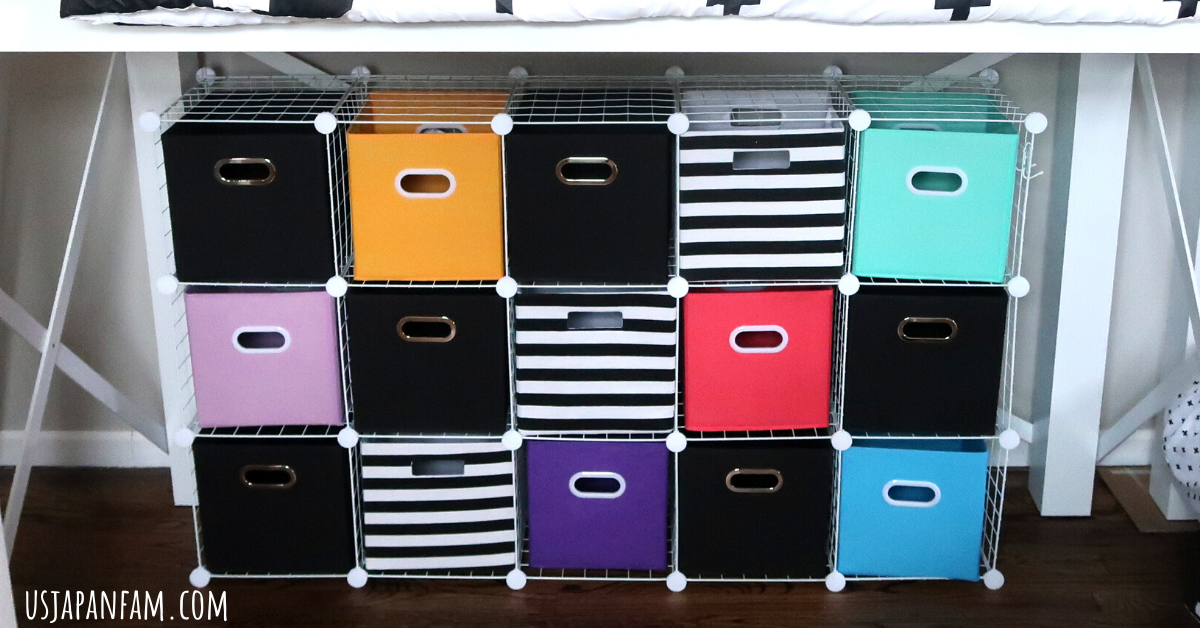
I wanted to avoid particle board dressers and storage units because of their potential toxic VOC off-gassing, so instead went with a wire frame cube storage unit (affiliate link) with fabric collapsible boxes. The frame was a PITA to assemble, but once together it seems like it'll work out. nicely, and I LOVE LOVE LOVE how it looks!! You have to be careful as the boxes can get caught up on little round disks that hold it together (you can see this in my video) but overall I think it's going to work out fine.
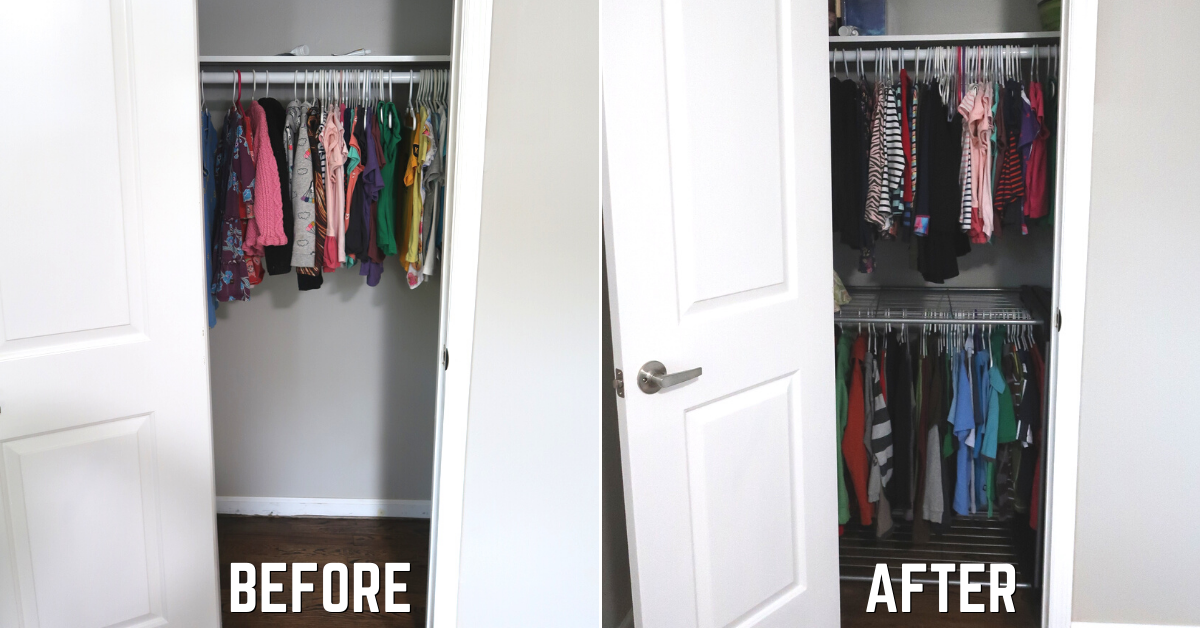
They have a decent sized closet in their bedroom so I added parts of an old hanging / storage unit we had to allow us to make use of the bottom half of the closet. We use it for all 3 kids shirts and dresses. Their pants, pajamas, undies, socks, and other items will go in the new cube storage unit - folded and rolled Marie Kondo style of course!!
OTHER ITEMS
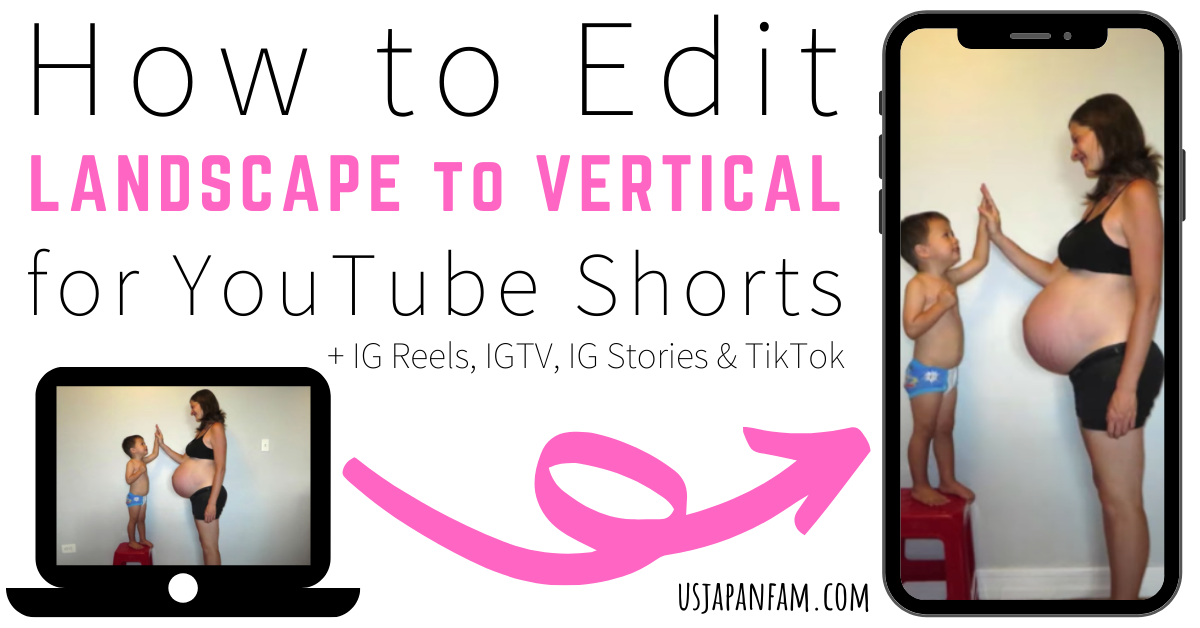
Every platform is trying to recreate the amazing success of TikTok, and for good reason! YouTube recently released Shorts (vertical videos under 60 seconds) and influencers are loving the new Instagram Reels. But did you know, you can upload to ALL OF THESE with just a quick edit from basically ONE VIDEO!?!? Even an old landscape video!
There are many ways to do it, but here's what I've been doing on my iMac and it's very simple! Watch my video tutorial below and read on for the detailed steps!
1. FILM
If you're filming something new, simply film with your phone in vertical orientation. You can also use landscape video footage as long as you are able to edit so that the content is viewable when cropped to .56 of the width.
2. EDIT
Edit the video as you would normally. For those looking for a mobile solution, you can easily achieve similar results using the Adobe Express free video editor on your smartphone. I use iMovie on my iMac. You need to edit the video down to the correct length for each specific platform. Then download the file to your computer. You may need to re-edit to a different length and download a few times, for example if you plan to upload to IGTV you'll need it at least 61 seconds, and if going on YT Shorts it'll need to be under 60 seconds. Very slight difference but very important!!
Here's an example of a video I edited to vertical from a landscape video, which was my YouTube channel's best performing video (almost 1 million views). Original on left, YouTube Shorts on right:
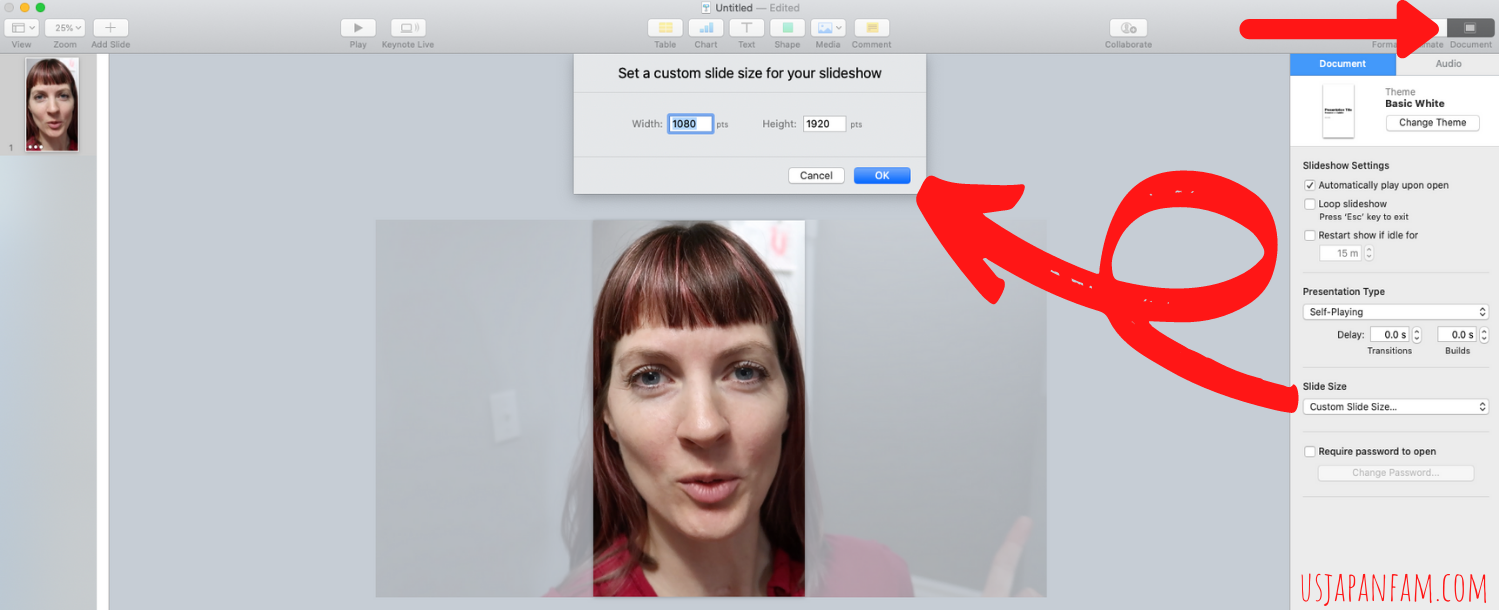
3. Make it Vertical (1920 tall x 1080 wide)
I do this by opening up Keynote and dragging the video into it.
4. May need to convert file type
You can simply upload the video right after exporting the Keynote project to movie in mpeg4 format. However, Instagram needs mp4, so you'll need to convert it for that and there are many free options. I usually use Cloud Convert. Then, because you need to upload from phone, on my computer I drag the converted mp4 file to my Google Drive and then download it from there onto my phone.
5. YouTube Shorts Specific Upload Notes
If you have shorts on your YouTube app, you can film and upload without all the above steps. The rest of us (most of us) don't have it yet so have to take above steps. Then, when you upload it, you'll have to be sure to include #SHORTS in the title and video description!!! You can create a landscape thumbnail as usual (I love Canva for this, just click "youtube thumbnail" and your size is spot on!), which will only be seen by people viewing the video on regular YouTube. Those viewing on Shorts won't see the thumbnail. Do your tags and SEO stuff as per the usual.
6. Enjoy the Sweet Smell of SUCCESS!!
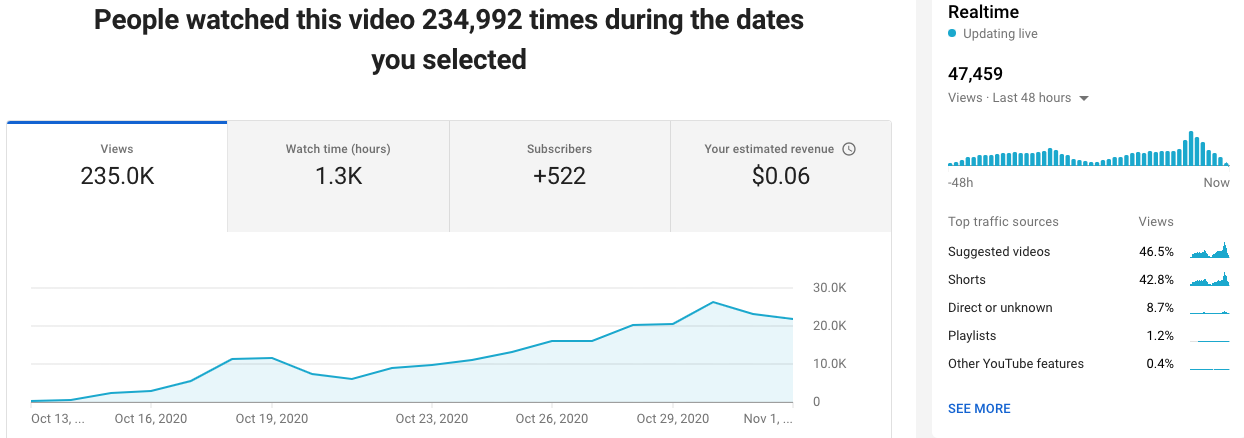
Some have been finding IG Reels to be getting TONS of views recently, especially in comparison to regular IG posts suffering the wrath of the algorithm. I haven't noticed mine doing great, but I have had some exciting results with YouTube shorts. Below are the analytics of the first Shorts video I did - I made a quick vertical version of my channel's top performing video (before and after videos embedded above) and it is KILLING it for my channel!! If your channel is monetized, the video will be monetized when viewed on regular YouTube, but not monetized when viewed via Shorts shelf. Since they're so short, they're not likely to bring in any substantial income, but they can get great views and more importantly, NEW SUBSCRIBERS!!!
I hope you found this tutorial helpful!! If you have any other tips, or you found an error, I'd really appreciate a comment below so I can keep this post up to date and accurate!!
|
About ME:I'm a NYC metro area mom blogger living in NJ with my Japanese husband & our 3 kids (twins plus 1), focusing on fun and honest product and travel reviews, saving moms time finding the best for their families! Find what you need in the menu bar or search section above! Categories
All
Archives
July 2024
|










 RSS Feed
